Hyderabadi Chicken Dum Biryani

This is the first dish I tasted on my visit to hyderabad after my wedding. I have fallen in love with this authentic and elegant delicacy since then. It is worth spending time to make this at home and watch your loving ones relish the dish. Hyderabadi dum biryani is a signature dish from hyderabad, the city of pearls and is said to be a blend of mughal and persian cuisine. Basmati rice cooked with layers of marinated chicken or meat in a wide, heavy bottomed vessel on a low flame, is where it gets the taste from. This process of cooking is also known as “Dum .
Cooking basmati rice nice and fluffy make your rice dishes look more beautiful. A little practice is all you need to cook this beautiful long grain rice. Here are a few tips for cooking basmati rice.
Wash rice two to three times under cold water to remove the starch.
soak rice for atleast 30mts in plenty of water. This allows the rice to expand and cook without breaking during cooking.
Add a tbsp of butter or oil to the boiling water while cooking rice. This would make the grains separate.
Make sure you cook the rice in a wide bottomed pan and do not disturb the rice by stirring in between. This would result in breakage of the rice.
Let the cooked rice rest for a while before serving it.
Methods of cooking basmati rice
Please note that the below methods are for cooking plain fully cooked basmati rice, however for biryani’s rice is half cooked with spices and layered with meat or chicken and then cooked again. I have explained this method in my recipe below.
Stove top
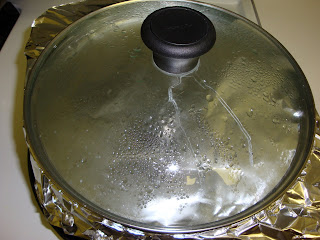
Wash and soak rice atleast 30 mts before cooking. In a wide bottomed vessel, add 2 cups of water for 1 cup of rice (I used a measuring cup for rice and water as well). Bring it to a boil on high flame. Meanwhile drain all the water from the rice and set aside. ( I used a strainer ). When you see bubbles playing around on top, add a tbsp of butter, oil or ghee to it. Add little salt. Slowly drop in the drained rice into the boiling water and allow it cook on high flame for 2-3 mts till you see rice on top and the water disappearing. Meanwhile heat a tawa/flat bottomed skillet on high heat. Now, reduce the heat to the lowest setting and place the rice pot on top of this tawa. Cover the vessel with a tight lid and cook for 15-20 mts. Switch of the flame and let it rest for another 5-10 mts before serving.
Note: If the lid of the vessel is not tight, then use an alluminium foil and cover the top tightly, then place the lid on top of it. Alternatively you can use a wet towel (Squeeze of all the water) to cover the vessel and place the lid on top of it.
Electric Cooker
One of the easiest ways to cook basmati rice is using an electric cooker. Wash and soak rice for 30 mts in cold water. Drain the water and set rice aside. In the electric cooker container, for every one cup of rice add 2 cups of water, close the lid and switch it on. The light goes off once the rice is ready. However make sure you don’t leave the rice in the cooker for a long time after the switch is off. This would result in the bottom layer of the rice turning hard. So cook it just prior to serving.
Microwave
Wash and soak rice for 30 mts in cold water. Drain the water and set rice aside. In a microwave safe bowl, for every one cup of rice add 2 cups of water and about 1/4 tsp salt. Cook uncovered for 10 to 12 mts. (Microwave timings vary oven to oven). After 10 mts, switch the oven off, remove the bowl to check if the rice is done. If not done, stir gently and put it back in the even for another 3 to 4 mts or till rice is cooked.
There are 3 basic steps for cooking a delicious hyderabadi chicken dum biryani.
Now lets get into the things we need for these 3 steps.
For the Marinade
Chicken – 1 lb (about ½ kg) skinned, washed and cut into cubes. Boneless
chicken can also be used but I prefer to use whole chicken with
bones. Make sure you drain all the water after washing the
chicken.
Mint leaves (pudina) – 10 sprigs finely chopped
Coriander leaves – 10 sprigs finely chopped
Saffron - 2 pinches soaked in ¼ cup of milk
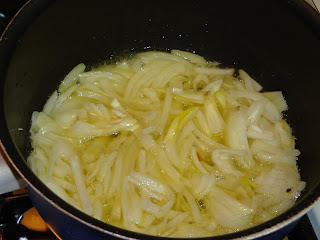
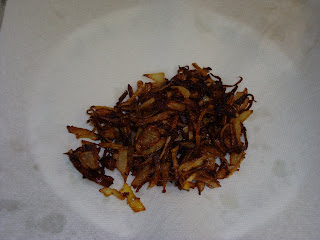
1 onion – finely sliced and deep fried till dark brown. (see pics)
yoghurt – ¾ cup ( I used a measuring cup)
chilli powder – 2 tbsp
Turmeric powder – ¼ tsp
garam masala – 2 tbsps (lightly roasted in a pan on low heat for 30 secs)
juice of 1 big lemon (about 4 tbsps)
Oil – ¼ cup
Salt – ½ tsp
Oil for deep frying the onions – ¼ cup
For the rice
Basmati rice – 2 cups ( I used a measuring cup). Wash under cold water and
soak for 30 mts then drain the entire water in a strainer and
set aside
Whole green Cardamom – 4
Cloves – 3
Black cumin seeds (Shahi jeera) – ¾ tsp
Bay leaves – 2
Biryani flower ( Anasapuvvu) – 1
Black pepper corns – 4
Butter/oil/ghee – 1 tbsp
Salt – 4 tbsps
Water for boiling – 10 cups ( I used a measuring cup)
A wide & deep sauce pan to cook rice
For cooking in layers
1 wide heavy bottomed deep vessel / pot
A large dosa pan / flat bottomed skillet
Pinch of red orange color dissolved in 2 tbsps milk or water (optional)
Alluminium foil or a wet towel (squeeze the entire water) to cover the pan. Alternatively you can use whole wheat flour dough to seal the edges so that the steam does’nt escape.
Now that you have all the ingredients ready. Lets take a peek at the recipe.
- In a sauce pan heat about 1/4 cup of oil and deep fry onions as shown in the below pics till dark brown. Remove the onions and drain them on the kitchen towel. Once cool, crush them and set aside. They are ready to be mixed in the marinade. Alternatively you can use store bought fried onions too.
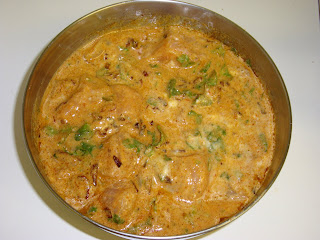
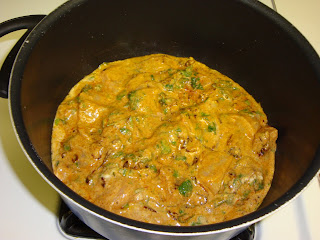
The first step is marinating the chicken:
In a large bowl, mix all the marinade ingredients till well combined. Cover and let it rest for an hour or overnight if you have some time. This would let the chicken absorb all the flavours of the spices and enhance the taste of your biryani.
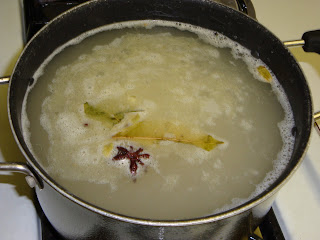
Cooking the basmati rice:
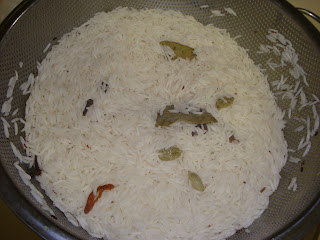
While the chicken is marinating, place a deep sauce pan on the stove with 10 cups of water on high flame. When the water gets to boil, throw in the spices (cardamom, cloves, shahijeera, bay leaves, bay flower, pepper corns, butter, and salt) and cook for a minute. Now gently add in the drained rice to the boiling water and let it cook on high flame till another boil (takes 4 mts).
Immediately drain the rice along with the spices in a strainer. Let all the water drain off. Set aside.
- Immediately drain the rice along with the spices in a strainer. Let all the water drain off. Set aside.
OK, show time now, cooking both the chicken and rice together. But now that everything is ready, this is going to be a cake walk. Trust me. You can do this. Its EASY.
Place a heavy wide bottomed deep pot or vessel on the stove top and turn it on high flame. Allow the pot to get hot for about a minute.
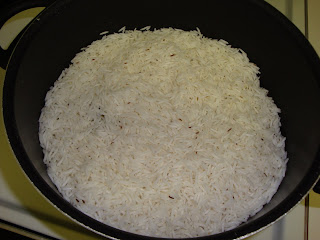
Now arrange the entire marinated chicken at the bottom of this pot. This is your first layer.
Then arrange the half cooked rice on top of the chicken. This is going to be your second and last layer.
On top of the rice, add about 2 - 3 tbsps of oil. Cover the pot with a lid and cook on high heat for 3 to 4 mts. Do not cook more than that because your chicken might get burnt.
Meanwhile heat a dosa pan/flat bottomed skillet on high heat till the pan is hot. Once hot reduce the flame to the lowest setting and place the chicken and rice pot on the tawa.
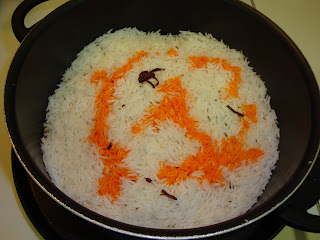
Remove the lid and pour in the red orange color water around in the center. This would give your rice the restaurant style look with some of the rice grains looking orange in color. Who would’nt want to surprise their guests with such looks!!!
Now seal the pot with an alluminium foil or a wet towel (squeeze all the water) or using the traditional whole wheat dough method. This allows the flavors of your chicken and rice to remain inside. Cook for 30 mts undisturbed on the tawa on the lowest setting. Switch of the flame and let it rest for 10 mts.
Just before serving open the lid, gently mix in the chicken at the bottom with the rice. serve it hot with mirchi ka salan or raita and enjoy.
I could’nt post the recipe for mirchi ka salan right away but promise to surely do it in my next post. Meanwhile do try the recipe and let me know how you liked it.
Labels: biryani, chicken biryani, Hyderabadi chicken biryani


